
Fixing scratched wood floors can be the source of some stress for our clients. This guide provides detailed steps and tips for repairing scratches on wood floors, from minor surface scratches to deeper gouges. If at any time you feel out of your depth or that you are unsure, remember we are here to help. We are time-served floor sanding and restoration experts.
Before diving into the repair process, it’s important to understand the types of scratches that can affect wood floors. There are three main categories:
- Surface Scratches: These are minor scratches that don’t penetrate the finish or the wood itself. They often result from dust, dirt, or small particles rubbing against the floor.
- Minor Scratches: These scratches go through the finish and lightly into the wood. They are usually caused by moving furniture, pet claws, or heeled shoes.
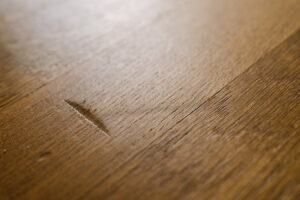
- Deep Scratches or Gouges: These are deeper marks that penetrate well into the wood, often caused by heavy furniture, dropped items, or tools.
Scratched Wood Floors – Repairing Surface Scratches
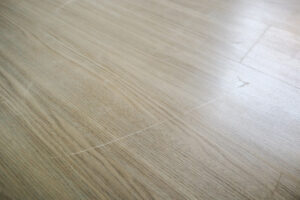 For surface scratches, follow these simple steps:
Step 1: Clean the Area
Use a soft cloth and a gentle wood cleaner to clean the scratched area. Ensure all dust and debris are removed, as these can cause further scratching during the repair process.
Step 2: Buff the Scratch
Lightly buff the scratched area with fine steel wool or a polishing compound. Move in the direction of the wood grain to avoid creating additional scratches. This step helps to smooth out the scratch and blend it with the surrounding finish.
Step 3: Apply Wood Polish
Apply a high-quality wood polish or floor finish to the repaired area. Use a soft cloth to rub it in gently, following the wood grain. Allow the polish to dry completely before using the floor.
Scratched Wood Floors – Repairing Minor Scratches
 For minor scratches that penetrate the finish and lightly into the wood, use the following method:
Step 1: Clean the Area
As with surface scratches, start by cleaning the scratched area thoroughly with a wood cleaner and soft cloth.
Step 2: Use a Wood Stain or Touch-Up Kit
Select a wood stain or touch-up kit that matches the color of your floor. Apply the stain to the scratch using a small brush or the applicator provided in the kit. Follow the manufacturer’s instructions for drying times.
Step 3: Apply a Finish
Once the stain is dry, apply a light coat of wood finish or polish over the repaired area. This step helps to protect the wood and blend the repair with the rest of the floor.
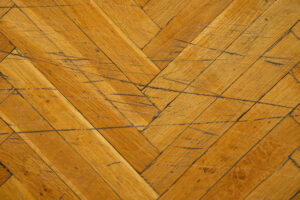
Scratched Wood Floors – Repairing Deep Scratches and Gouges
 Repairing deep scratches and gouges requires more effort and precision:
Step 1: Clean the Area
Clean the gouged area thoroughly to remove any dust, dirt, or debris. Use a vacuum cleaner to ensure all particles are removed from the scratch.
Step 2: Sand the Area
Using sandpaper, gently sand the scratched area to smooth out the gouge. Start with a coarser grit (120) and gradually move to finer grits (150, 220) for a smooth finish. Always sand in the direction of the wood grain to avoid further damage.
Step 3: Fill the Gouge
Use a wood filler stick or putty that matches the colour of your floor. Apply the filler to the gouge using a putty knife, pressing it firmly into the scratch. Smooth the surface with the putty knife and remove any excess filler.
Step 4: Sand and Stain
Once the filler is completely dry, lightly sand the area again to ensure a smooth surface. Apply a matching wood stain to the repaired area using a small brush, blending it with the surrounding wood.
Step 5: Apply a Finish
Finish the repair by applying a coat of wood finish or polish. Use a soft cloth to rub it in gently, following the wood grain. Allow the finish to dry completely before using the floor.
Preventing Future Scratches
To maintain the beauty of your wood floors and prevent future scratches, follow these tips:
- Use Rugs and Mats: Place rugs or mats in high-traffic areas and near entryways to catch dirt and debris that can cause scratches.
- Lift Furniture: When moving furniture, lift it rather than dragging it across the floor to avoid scratching the surface.
- Trim Pet Nails: Keep your pets’ nails trimmed to prevent them from scratching the floor.
- Use Furniture Pads: Attach felt pads to the bottom of furniture legs to prevent them from scratching the floor.
- Regular Cleaning: Sweep or vacuum your floors regularly to remove dirt and debris that can cause scratches.
Repairing scratched wood floors can seem daunting, but with the right tools, materials, and techniques, you can restore their beauty and prolong their lifespan. Whether dealing with surface scratches, minor scratches, or deep gouges, this guide provides comprehensive steps to help you repair and maintain your wood floors effectively. Remember to take preventive measures to protect your floors and keep them looking their best for years to come. Call if you are looking for a floor sanding quote on 0800 852 7177.
Leave A Comment